My year

Posted on December 7th, 2014 in Aerodynamics,AutoSpeed,Driving Emotion,Economy,electric,Honda,Hybrid Power,Intercooling,Opinion by Julian Edgar

Well, it’s nearly the end of the year, and I have been reflecting on my busy car modification 12 months.

All the modifications I have done have been to my little Honda Insight.

Fitting a turbo, water/air intercooler and making and fitting a new airbox. Installing a MoTeC M400 ECU, and then doing all the engine mapping on the road. Fitting a MoTeC CDL3 dash, and then upgrading to an ADL3 dash.

It’s been a huge amount of fun turning the all-alloy, two-seater Honda hybrid into a fuel-efficient turbo with about 70 per cent more power than standard from its 1 litre, 3-cylinder engine.

None of these mods was cheap, but all gave the results I’d been hoping for.

And in the last few weeks I have been playing with the suspension. And, so far, this has been cheap! I calculated the required specs for new springs front and back, sourced them at near zero cost, then installed them. That step was very successful, so then I fitted a new rear antiroll bar – this time, for a cost of less than fifty bucks.

The car is absolutely transformed in both ride and handling – and I am yet to fit the new dampers, which at the time of writing, are on their way from the US.

Sitting in the corner is the next Insight modification – a Tritium Wavesculptor200 high voltage electric motor controller. It will be used to run the Honda’s standard 10kW electric motor, although not always at only 10kW. Given the nature of electric motors, I should be able to over-rate it for short periods, gaining perhaps 20kW for huge short-term torque.

I plan on controlling the Wavescluptor200 using outputs from the MoTeC ADL3 dash. The dash – really, a digital control system that happens to have a display – has a full range of programmable maths functions and can use 3D look-up tables.

The new high voltage battery pack and battery monitoring system? I am yet to decide on these things.

I don’t know if I will achieve my final aim of 0-100 km/h in the Sixes and fuel economy in the high Twos (litres/100km), but the challenge is enormously exciting and rewarding.

In the meantime, we’re off to the United States for five weeks. We’ll be concentrating on the eastern side of the country, and have on our itinerary a long list of technical and automotive sights – and sites. We hope to next year bring you a series in AutoSpeed that describes some of what we see.

Finally, I also published another three books this year – if you are interested, search on Amazon under my name.

Have a safe and happy Christmas and New Year, and remember: for fun and challenge, nothing beats modifying your car!

Water/air intercooling

Posted on July 1st, 2014 in Intercooling,testing,Turbocharging by Julian Edgar

We will be covering in a later issue of AutoSpeed what I am about to write about – so this is just a quick heads-up.

If you are developing a custom water/air intercooling system, here are some critical questions for you.

1. How can you bleed all air out of the system? Nearly all commercially available aftermarket water/air heat exchangers don’t have bleed fittings. If you are mounting these heat exchangers conventionally, eg horizontally, about one-third of the internal volume will stay full of air – not water!

2. How are you measuring pump flow? If your answer is to pull off a hose and direct it into a bucket, then almost certainly the amount you measure will not be correct. Why? Because pumps will often work differently when they are part of a closed system versus an open system.

3. Finally, is the pump flowing effectively – or is it cavitating? Of the three pumps I tried in my system, only one was effective in circulating water without any apparent cavitation.

Looking around the web at pics of custom water/air intercooling systems, I’d guess that many (most?) of these systems are operating below par because of these issues.


Turning over a new leaf

Posted on March 14th, 2014 in Intercooling,tools,Turbocharging by Julian Edgar

Over the last few weeks I have been working on my little Honda Insight. I’ve been installing a turbo, water/air intercooler system and a new airbox, the latter fabricated from scratch.

It’s a complex job in that there’s not much space – especially when I am deliberating oversizing everything (but the turbo) to improve volumetric efficiency.

I am also doing things in a significantly different way to the approach I’ve used previously.

So what’s different then?

Specifically, I am being very careful that each newly-placed nut or bolt can be easily accessed by a tool. This means that instead of just looking at aspects like strength, weight and functionality, I am adding another criterion – can I get a spanner (easily) on that bolt?

It might seem a kinda obvious thing to do but I must admit I have never much done this in the past. In fact, I remember working on my little Daihatsu Handi turbo, way back around 20 years ago. The water/air intercooler I first installed on that car was so tight for space that the nuts had to be placed on bolts using long-handled, long-nose pliers. Yes, both long-nose and long-handled!

It was like performing surgery.

I got so jack of it that in the end I removed that intercooler heat exchanger and fitted another that sat on top of the engine rocker cover, in clear view – and with clear access.

The trickiest job so far on the Honda has also involved a water/air heat exchanger core, the one that sits on a fabricated steel frame bolted to the top of the gearbox, next to the engine.

The intercooler bolts to the frame via three rubber mounts. I need to (1) gain access to the frame’s mounts to bolt it to the gearbox, and then (2) gain access to both ends of the rubber feet, and (3) gain access to the bolts that hold little (extra) brackets to the intercooler core itself.

So far I am JUST successful: the rear bolts for the intercooler rubber mounts, positioned partly under the windscreen in the deeply indented firewall, can be accessed by using a short 12mm spanner – not a ratchet spanner as it looks may be needed, but a conventional spanner. The other fasteners are all easily accessible.

Another tricky job were the mounts for the airbox. A long cylindrical design mounted at an angle to the horizontal, it also sits on the gearbox. By manipulating the bracket design until it was all ‘just so’, I am able to access all three mounting bolts using a long extension on my small socket set.

Importantly, making a design that allowed access to these points was almost the first step in the process – I didn’t position the airbox solely for plumbing access to the turbo. Had I done this, the bolts holding the airbox in position would have been ‘blind’, and furthermore, would have needed tiny hands to even get to them.

And I have to say, positioning the fasteners for good access has made it so much easier to work on the car. That’s especially noticeable when some items, like the airbox, have been on and off perhaps 50 times while the intercooler water hoses have been routed and then fastened into place, and then the intercooler-to-throttle-body tube has been fabricated (twice!).

So for me no more the bad habits of the past: now everything I install has to be easy to work on, no matter how small the space into which it must fit.

350kW and 0-100 km/h in 4.6 seconds

Posted on March 24th, 2009 in AutoSpeed,Driving Emotion,Intercooling,Power by Julian Edgar

Today I was lucky enough to drive an interesting car.

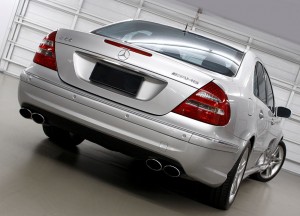
A 2003 model AMG Mercedes Benz E55, it comes standard with a supercharged 5.4 litre, 3-valves-per-cylinder V8 boosted by a Lysholm compressor spinning at up to 23,000 rpm and pushing air through a water/air intercooler.

Insulating paints?

Posted on July 28th, 2008 in Driving Emotion,Intercooling,Technologies by Julian Edgar

Whenever talk turns to intercooler colour, two schools of thought emerge. There are those who suggest intercoolers should be painted black to aid heat dissipation. Then there are those who suggest the insulating properties of paint would outweigh any better thermal emissivity the intercooler would gain with its colour change.

I have always thought – and continue to think – that the insulating properties of a very thin layer of paint would be effectively nil. After all, you don’t have much faith in that ‘insulation’ when you’re reluctant to put your hand on a painted exhaust manifold or exhaust pipe!

But what about paints that are designed to insulate? Clearly you wouldn’t put them on an intercooler – but what about the pipe coming back from the intercooler to the inlet manifold? As I wrote in Insulating the Return, measurable gains can be made if engine bay heat is prevented from warming the returning air.

At least two different approaches are taken to insulating paints. The first is where the special paint is bought and simply applied. The other approach is where you mix an additive in an existing paint.

A bargain to be had…

Posted on November 27th, 2007 in Driving Emotion,Ford,Intercooling,Turbocharging by Julian Edgar

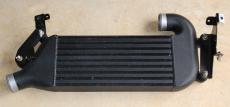
xr6-intercooler.jpgRight now – and probably for the next few years – there’s a helluva bargain to be had.

I’ve bought one to put on the shelf and I highly recommend that anyone else into useable road performance does so too. And what should you buy? At least one of all those BA and BF Ford Falcon XR6 intercoolers that are being flogged-off on Australian eBay, commonly priced from about fifty bucks.

Yes, from fifty bucks.

Now maybe the people who want far in excess of the Falcon’s standard 240kW have an urgent need to replace these Garret-cored, bar-and-plate intercoolers with something far better, but for people who are happy to drive a car with performance not limited by wheelspin, these intercoolers look perfect. Being an all-welded design, they’d also be dead-easy to jacket with aluminium sheet, making them water/air intercooler cores. At a core size of 370 x 175 x 60mm, they’re relatively compact but have well-shaped alloy end tanks. For people wondering overall size, they’re 620 x 270 X 60 cm to the extremities. Inlet/outlet tube size is 58mm (hose ID).

Even if you consider the time and labour to fold up new end tanks from sheet aluminium and pay someone to TIG them to the original core, you’re still talking an excellent intercooler for the price.

The one I bought came with all its hoses and clamps – also very useful when you’re plumbing any intercooler into place.

Without having done any flow or temperature testing, but looking at the core and assessing the original application, I’d be happy running at least 200kW through them – more, eg 250kW – with a good water spray.